
Jellyfin – это бесплатное приложение с открытым исходным кодом для потоковой передачи мультимедиа, которое организует, управления и обмена цифровыми медиафайлами на сетевые устройства. Оно позволяет транслировать загруженные медиафайлы на ПК, ноутбук, мобильный телефон. Оно предоставляет интерактивный веб-интерфейс для управления всеми вашими фотографиями, видео и музыкой. Если вы ищете альтернативное решение для Plex и Netflix, Jellyfin – лучший вариант.
Что умеет:
- Бесплатный, с открытым исходным кодом и кросс-платформенный
- Поддерживает аппаратное ускорение кодирования/декодирования видео с помощью FFMpeg
- Позволяет получать метаданные из TheTVDB и TheMovieDB
- Нет ограничений на воспроизведение в мобильных приложениях
Этот пост покажет вам, как установить приложение Jellyfin для потоковой передачи медиа с Nginx и Let’s Encrypt SSL на Debian 11.
Установка Jellyfin
Перед началом работы вам необходимо добавить репозиторий Jellyfin в APT. Для этого сначала установите необходимые зависимости с помощью следующей команды:
apt-get install apt-transport-https ca-certificates gnupg2 curl git -y
После установки всех зависимостей добавьте GPG ключ и репозиторий с помощью следующей команды:
wget -O - https://repo.jellyfin.org/jellyfin_team.gpg.key | apt-key add -echo "deb [arch=$( dpkg --print-architecture )] https://repo.jellyfin.org/debian bullseye main" | tee /etc/apt/sources.list.d/jellyfin.list
Следующим образом обновите репозиторий и установите Jellyfin с помощью следующей команды:
apt-get update -yapt-get install jellyfin -y
После установки Jellyfin вы можете проверить статус Jellyfin с помощью следующей команды:
systemctl status jellyfin
Вы получите следующий результат:
? jellyfin.service - Jellyfin Media Server
Loaded: loaded (/lib/systemd/system/jellyfin.service; enabled; vendor preset: enabled)
Drop-In: /etc/systemd/system/jellyfin.service.d
    ??jellyfin.service.conf
Active: active (running) since Fri 2022-02-04 03:48:50 UTC; 9s ago
Main PID: 4989 (jellyfin)
Tasks: 19 (limit: 2341)
Memory: 85.0M
CPU: 4.069s
CGroup: /system.slice/jellyfin.service
    ??4989 /usr/bin/jellyfin --webdir=/usr/share/jellyfin/web --restartpath=/usr/lib/jellyfin/restart.sh --ffmpeg=/usr/lib/jellyfin->
Feb 04 03:48:56 debian11 jellyfin[4989]: [03:48:56] [INF] ServerId: 809b343f6da845699dd6447e1bb4f061
Feb 04 03:48:56 debian11 jellyfin[4989]: [03:48:56] [INF] Registering publisher for urn:schemas-upnp-org:device:MediaServer:1 on 127.0.0.1/32
Feb 04 03:48:56 debian11 jellyfin[4989]: [03:48:56] [WRN] 127.0.0.1/32: GetBindInterface: Loopback 127.0.0.1 returned.
Feb 04 03:48:56 debian11 jellyfin[4989]: [03:48:56] [INF] Executed all pre-startup entry points in 0:00:00.2808517
Feb 04 03:48:56 debian11 jellyfin[4989]: [03:48:56] [INF] Core startup complete
Feb 04 03:48:57 debian11 jellyfin[4989]: [03:48:57] [INF] Executed all post-startup entry points in 0:00:00.2169291
Feb 04 03:48:57 debian11 jellyfin[4989]: [03:48:57] [INF] Startup complete 0:00:06.7385186
Feb 04 03:48:59 debian11 jellyfin[4989]: [03:48:59] [INF] StartupTrigger fired for task: Update Plugins
Feb 04 03:48:59 debian11 jellyfin[4989]: [03:48:59] [INF] Queuing task PluginUpdateTask
Feb 04 03:48:59 debian11 jellyfin[4989]: [03:48:59] [INF] Executing Update Plugins
По умолчанию Jellyfin прослушивает порт 8096. Вы можете проверить это с помощью следующей команды:
ss -antpl | grep 8096
LISTEN 0      512          0.0.0.0:8096      0.0.0.0:*    users:(("jellyfin",pid=4989,fd=289))
Настройка Nginx в качестве обратного прокси для Jellyfin
Далее вам нужно установить и настроить Nginx в качестве обратного прокси для Jellyfin. Сначала установите Nginx следующей командой:
apt-get install nginx -y
Следующей командой создайте файл конфигурации виртуального хоста Nginx:
nano /etc/nginx/conf.d/jellyfin.conf
Добавьте следующие строки:
server {
      listen 80;
      server_name jellyfin.example.com;

      access_log /var/log/nginx/jellyfin.access;
      error_log /var/log/nginx/jellyfin.error;

    resolver 127.0.0.1 valid=30;

    # Security / XSS Mitigation Headers
    add_header X-Frame-Options «SAMEORIGIN»;
    add_header X-XSS-Protection «1; mode=block»;
    add_header X-Content-Type-Options «nosniff»;


    location / {
        # Proxy main Jellyfin traffic
        proxy_pass http://localhost:8096;
        proxy_set_header Host $host;
        proxy_set_header X-Real-IP $remote_addr;
        proxy_set_header X-Forwarded-For $proxy_add_x_forwarded_for;
        proxy_set_header X-Forwarded-Proto $scheme;
        proxy_set_header X-Forwarded-Protocol $scheme;
        proxy_set_header X-Forwarded-Host $http_host;

        # Disable buffering when the nginx proxy gets very resource heavy upon streaming
        proxy_buffering off;
    }

    # location block for /web – This is purely for aesthetics so /web/#!/ works instead of having to go to /web/index.html/#!/
    location = /web/ {
        # Proxy main Jellyfin traffic
        proxy_pass http://localhost:8096/web/index.html;
        proxy_set_header Host $host;
        proxy_set_header X-Real-IP $remote_addr;
        proxy_set_header X-Forwarded-For $proxy_add_x_forwarded_for;
        proxy_set_header X-Forwarded-Proto $scheme;
        proxy_set_header X-Forwarded-Protocol $scheme;
        proxy_set_header X-Forwarded-Host $http_host;
    }

    location /socket {
        # Proxy Jellyfin Websockets traffic
        proxy_pass http://localhost:8096/socket;
        proxy_http_version 1.1;
        proxy_set_header Upgrade $http_upgrade;
        proxy_set_header Connection «upgrade»;
        proxy_set_header Host $host;
        proxy_set_header X-Real-IP $remote_addr;
        proxy_set_header X-Forwarded-For $proxy_add_x_forwarded_for;
        proxy_set_header X-Forwarded-Proto $scheme;
        proxy_set_header X-Forwarded-Protocol $scheme;
        proxy_set_header X-Forwarded-Host $http_host;
    }
}
Сохраните и закройте файл, затем проверьте Nginx на наличие синтаксических ошибок.
nginx -t
nginx: the configuration file /etc/nginx/nginx.conf syntax is ok
nginx: configuration file /etc/nginx/nginx.conf test is successful
И наконец, перезапустите Nginx для применения изменений:
systemctl reload nginx
Для проверки состояния Nginx используйте следующую команду:
systemctl status nginx
Вы должны увидеть следующий результат:
? nginx.service - A high performance web server and a reverse proxy server
Loaded: loaded (/lib/systemd/system/nginx.service; enabled; vendor preset: enabled)
Active: active (running) since Fri 2022-02-04 03:49:27 UTC; 55s ago
Docs: man:nginx(8)
Process: 6314 ExecStartPre=/usr/sbin/nginx -t -q -g daemon on; master_process on; (code=exited, status=0/SUCCESS)
Process: 6315 ExecStart=/usr/sbin/nginx -g daemon on; master_process on; (code=exited, status=0/SUCCESS)
Process: 6454 ExecReload=/usr/sbin/nginx -g daemon on; master_process on; -s reload (code=exited, status=0/SUCCESS)
Main PID: 6395 (nginx)
Tasks: 2 (limit: 2341)
Memory: 2.8M
CPU: 66ms
CGroup: /system.slice/nginx.service
    ??6395 nginx: master process /usr/sbin/nginx -g daemon on; master_process on;
    ??6455 nginx: worker process
Feb 04 03:49:27 debian11 systemd[1]: Starting A high performance web server and a reverse proxy server...
Feb 04 03:49:27 debian11 systemd[1]: nginx.service: Failed to parse PID from file /run/nginx.pid: Invalid argument
Feb 04 03:49:27 debian11 systemd[1]: Started A high performance web server and a reverse proxy server.
Feb 04 03:50:17 debian11 systemd[1]: Reloading A high performance web server and a reverse proxy server.
Feb 04 03:50:17 debian11 systemd[1]: Reloaded A high performance web server and a reverse proxy server.
Доступ к веб-интерфейсу Jellyfin
Сейчас откройте веб-браузер и зайдите на веб-интерфейс Jellyfin, используя URL http://jellyfin.example.com. Вы будете перенаправлены на следующую страницу:
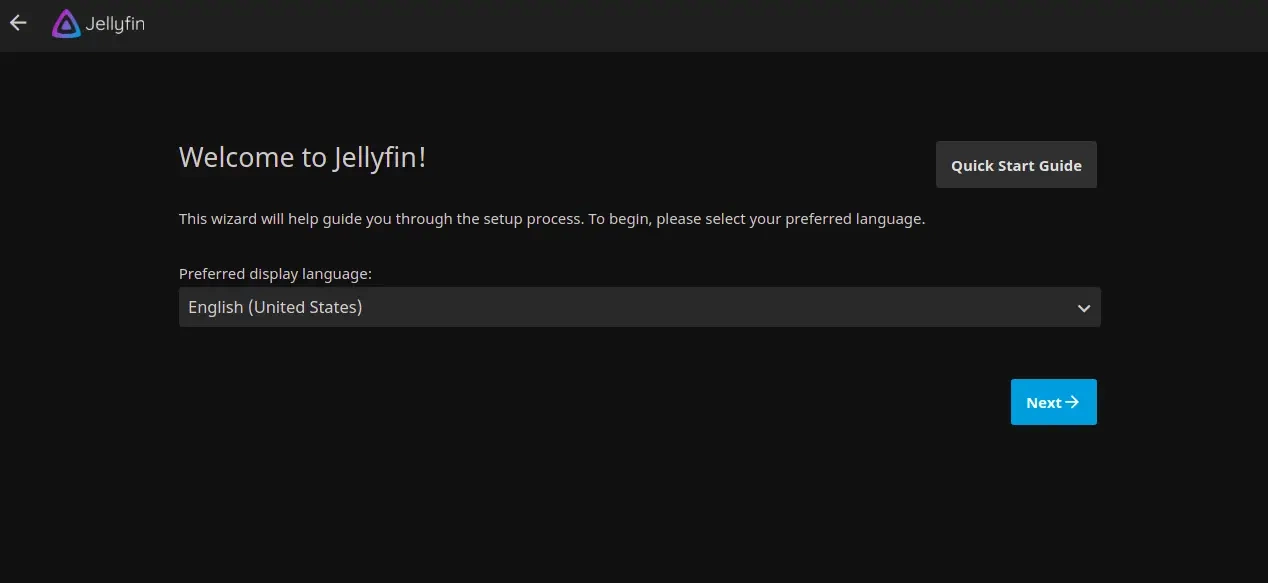
Выберите язык и нажмите на кнопку Next. Вы должны увидеть следующую страницу:
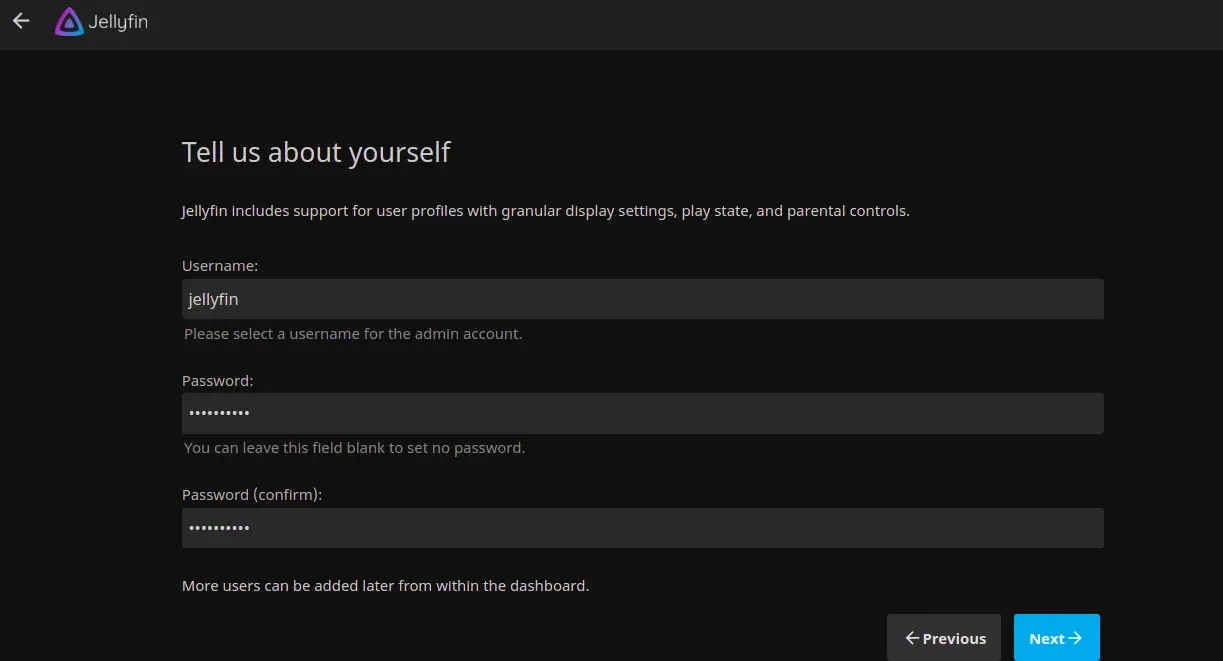
Укажите пользователя admin, пароль и нажмите на кнопку Next. Вы должны увидеть следующую страницу:
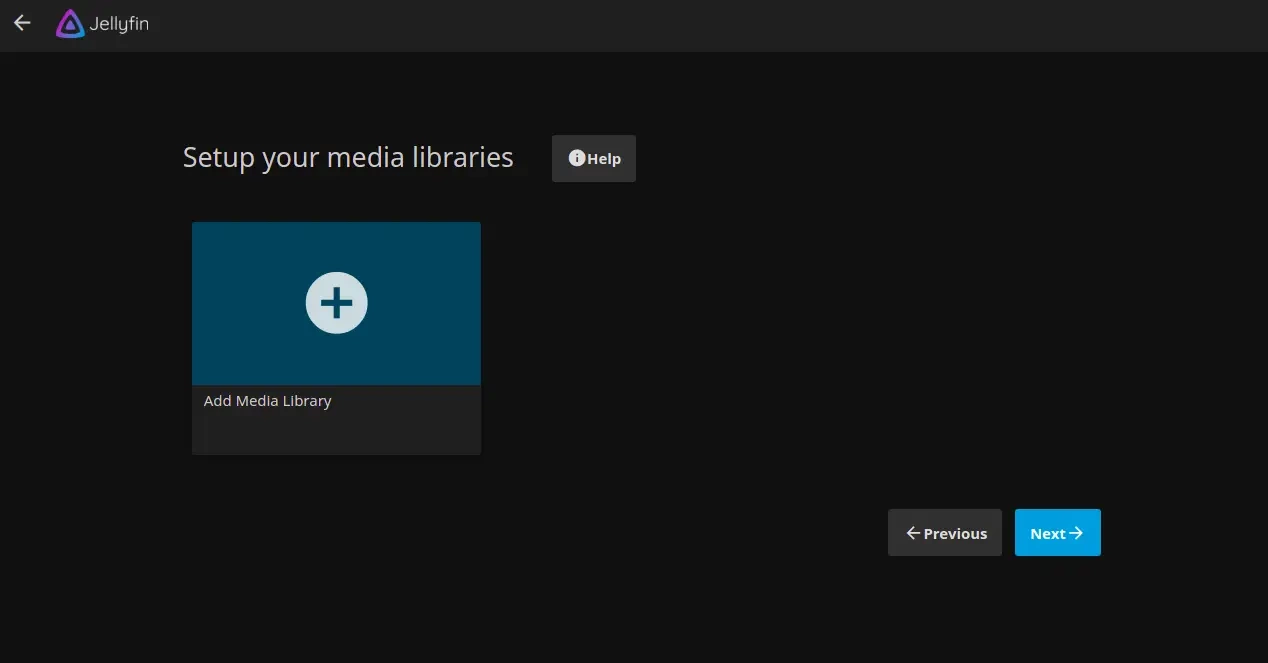
Нажмите на кнопку Next. Вы должны увидеть следующую страницу:
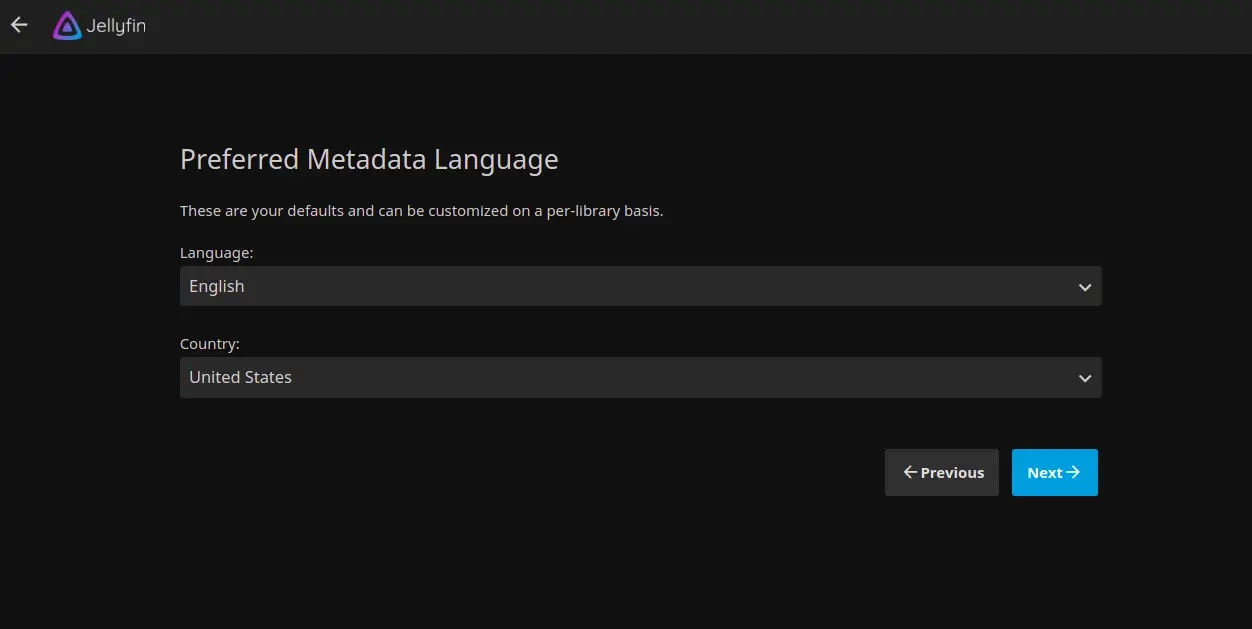
Выберите язык метаданных и нажмите на кнопку Next. Вы должны увидеть следующую страницу:
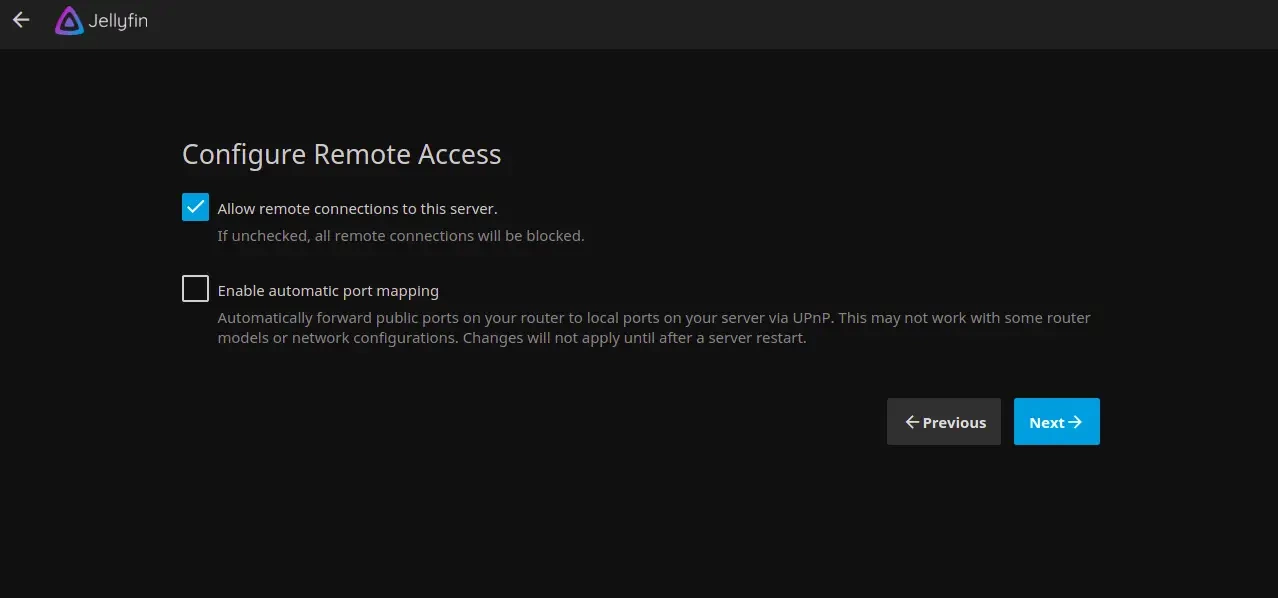
Выберите предпочтительный вариант и нажмите на кнопку Следующая. После установки Jellyfin вы увидите следующую страницу:

Нажмите на кнопку Finish. Вы будете перенаправлены на страницу входа в Jellyfin:
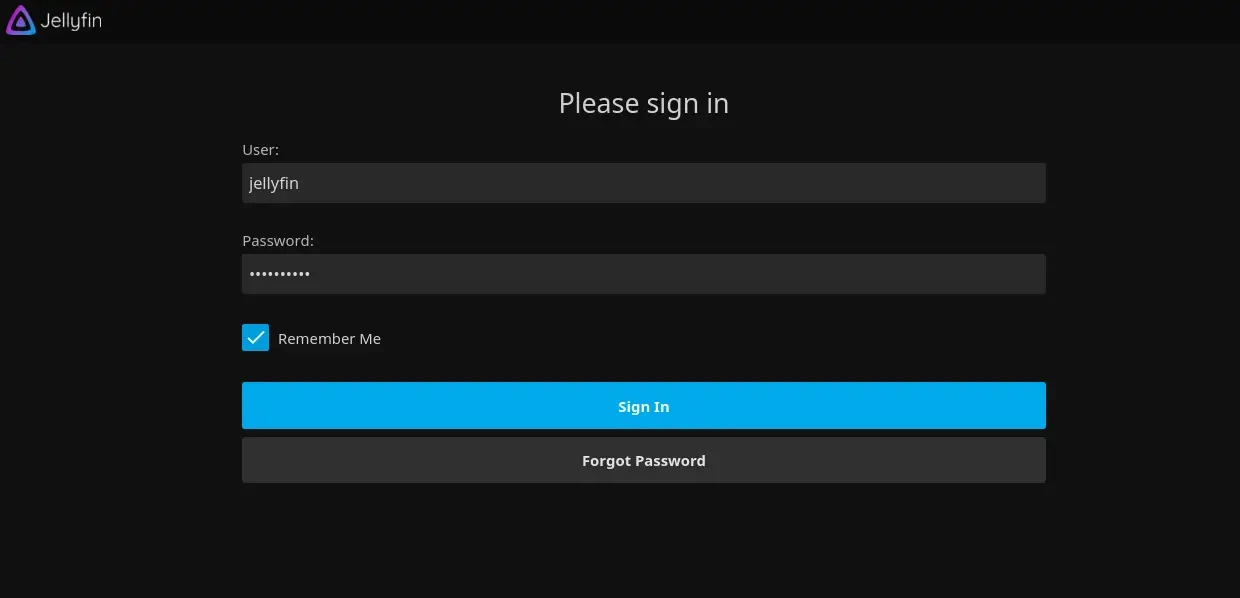
Укажите ваше имя пользователя, пароль администратора и нажмите на кнопку Зарегистрироваться. Вы увидите панель Jellyfin на следующей странице:

Защита Jellyfin с помощью Let’s Encrypt
Следующим шагом вам нужно установить клиентский пакет Certbot для установки и управления Let’s Encrypt SSL.
Сначала установите Certbot с помощью следующей команды:
apt-get install certbot python3-certbot-nginx -y
После завершения установки выполните следующую команду для установки Let’s Encrypt SSL на ваш сайт:
certbot --nginx -d jellyfin.example.com. Вам будет предложено указать действительный адрес электронной почты и принять условия предоставления услуг, как показано ниже:
Saving debug log to /var/log/letsencrypt/letsencrypt.log
Plugins selected: Authenticator nginx, Installer nginx
Enter email address (used for urgent renewal and security notices) (Enter 'c' to
cancel): [email protected]
- - - - - - - - - - - - - - - - - - - - - - - - - - - - - - - - - - - - - - - -
Please read the Terms of Service at
https://letsencrypt.org/documents/LE-SA-v1.2-November-15-2017.pdf. You must
agree in order to register with the ACME server at
https://acme-v02.api.letsencrypt.org/directory
- - - - - - - - - - - - - - - - - - - - - - - - - - - - - - - - - - - - - - - -
(A)gree/(C)ancel: A
- - - - - - - - - - - - - - - - - - - - - - - - - - - - - - - - - - - - - - - -
Would you be willing to share your email address with the Electronic Frontier
Foundation, a founding partner of the Let's Encrypt project and the non-profit
organization that develops Certbot? We'd like to send you email about our work
encrypting the web, EFF news, campaigns, and ways to support digital freedom.
- - - - - - - - - - - - - - - - - - - - - - - - - - - - - - - - - - - - - - - -
(Y)es/(N)o: Y
Obtaining a new certificate
Performing the following challenges:
http-01 challenge for jellyfin.example.com
Waiting for verification...
Cleaning up challenges
Deploying Certificate to VirtualHost /etc/nginx/conf.d/jellyfin.conf
Следующим шагом выберите, нужно ли перенаправлять HTTP-трафик на HTTPS, как показано ниже:
- - - - - - - - - - - - - - - - - - - - - - - - - - - - - - - - - - - - - - - -
1: No redirect - Make no further changes to the webserver configuration.
2: Redirect - Make all requests redirect to secure HTTPS access. Choose this for
new sites, or if you're confident your site works on HTTPS. You can undo this
change by editing your web server's configuration.
- - - - - - - - - - - - - - - - - - - - - - - - - - - - - - - - - - - - - - - -
Select the appropriate number [1-2] then [enter] (press 'c' to cancel): 2
Тип 2 и нажмите Enter для завершения установки. Вы должны увидеть следующее сообщение:
Redirecting all traffic on port 80 to ssl in /etc/nginx/conf.d/jellyfin.conf
- - - - - - - - - - - - - - - - - - - - - - - - - - - - - - - - - - - - - - - -
Congratulations! You have successfully enabled https://jellyfin.example.com
You should test your configuration at:
https://www.ssllabs.com/ssltest/analyze.html?d=jellyfin.example.com
- - - - - - - - - - - - - - - - - - - - - - - - - - - - - - - - - - - - - - - -
IMPORTANT NOTES:
- Congratulations! Your certificate and chain have been saved at:
/etc/letsencrypt/live/jellyfin.example.com/fullchain.pem
Your key file has been saved at:
/etc/letsencrypt/live/jellyfin.example.com/privkey.pem
Your cert will expire on 2022-05-07. To obtain a new or tweaked
version of this certificate in the future, simply run certbot again
with the "certonly" option. To non-interactively renew *all* of
your certificates, run "certbot renew"
- Your account credentials have been saved in your Certbot
configuration directory at /etc/letsencrypt. You should make a
secure backup of this folder now. This configuration directory will
also contain certificates and private keys obtained by Certbot so
making regular backups of this folder is ideal.
- If you like Certbot, please consider supporting our work by:
Donating to ISRG / Let's Encrypt:   https://letsencrypt.org/donate
Donating to EFF:                    https://eff.org/donate-le
- We were unable to subscribe you the EFF mailing list because your
e-mail address appears to be invalid. You can try again later by
visiting https://act.eff.org.
Заключение
Поздравляем! Вы успешно установили Jellyfin с Nginx и Let’s Encrypt SSL на Debian 11. Теперь вы можете начать загружать медиафайлы и транслировать их с мобильных устройств.


Комментарии (0)